It feels like I must have talked about this before but after you’ve done hundreds of posts it gets kind of fuzzy and I couldn’t find anything when I searched. No matter, it’s a good subject to revisit.
I guess to start at the very beginning is to talk about shopping. Whether I'm at an antique mall, flea market, or yard sale I'm always on the lookout for handkerchiefs to add to my stash. If the price is right I always buy plain white ones with colored crochet edgings — these get layered under the printed and embroidered ones. For the hankies that go on top, I buy ones that catch my eye. Maybe it features a flower I'm particularly fond of, a cool technique (like the appliqued butterfly shown below), or a print that matches a fabric I have at home. It's hard to explain but they speak to me.

I like to use visual "tricks" like the diamond-shaped button that echoes the butterfly wings.
When I get them home and cleaned up (soaked, washed and ironed, if needed) they get added to a box with the others. This is the first thing I pull down from the shelf when I get an order for sachets. The next step is to match up a hanky for the top layer with one that has a crochet edge for the bottom and that's simply a visual thing. I look for a color match but not necessarily with the predominant color. Sometimes it's better to choose a color that you only see small amount of. Like the coral from the gray edging shown here. Once I have a good combination I go to my fabric stash to see what will work with it. Again, that’s usually a color thing. But I might match a flower or choose a polkadot fabric if there are dots in the print. Sometimes I'll find a fabric that's perfect with the hanky but doesn't look good with the crochet so I might change my mind.

I played up the coral thread running through the gray crochet edging with the rose print hanky on top and continued the rose theme by using a rosebud striped fabric underneath. A matching coral button is layered over a plain white one.
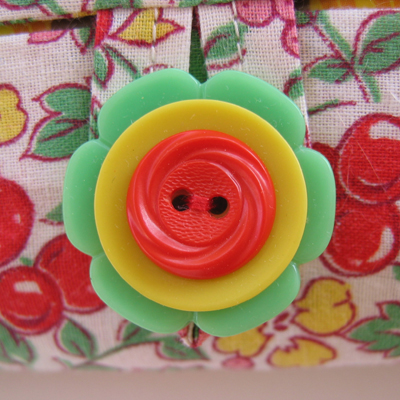
Buttons are the last step and can be challenging. Not only am I looking for a color combination that works with all the other parts but the buttons have to fit together and stack well. Otherwise they'll slide around when sewn down. Sometimes I’ll have the perfect button to match a flower in the hanky. Often I have to try lots and lots of combinations. I try to keep a good supply of large flat buttons and ones with an inset on top for the bottom layer. Small pearl and baby buttons can be good choices for the top layer. Bright colors are always good!

This is actually from one of my tissue cozies but same idea.

A stack of three with a pearl baby button on top.
Sometimes the planets align and all the parts come together quickly. I just know. But often I let the materials sit on my work table overnight and revisit my choices the next day. If I’m still happy with it then I’ll go ahead and start cutting. Once in a while I shake my head and wonder what I was thinking! Then I might try another fabric or start over from the beginning. It’s really very intuitive and I try not to force it even if I’m on a deadline and need to make a large quantity.

My favorite hankies are the brightly-colored ones. I used a turquoise stripe fabric underneath but (in hindsight) this may have worked better with a bright yellow stripe or dot fabric, although I may not have had one at the time. I did pick up some of the bright colors in the buttons.
That's it. And this is pretty much the same process I use to choose materials for all of the creations—tissue cozies to pillows. It helps to have a good eye for color but that can be learned with practice. And, if you don't have a large stash of materials at home, take your hankies to the fabric store and see what you can find. I do this all the time :)


8 comments:
Your sachets are very lovely! You do a great job matching the handkerchiefs, fabric and buttons!
Blessings,
Diane
I love how you stack the buttons!
hi... am dharshana..
your stitch school is really excellent and very helpful..
actually i hav juz finished my graduation n am plannin to start with embroidery which is my passion...
so wen i was searchin net for help,i found urs n found it really helpful..THANK U...
those pictures for the stitches r amazing..
the patterns,vintage work,the way u explain r fabulous...
being a beginner,i am able to understand the stitches from the pics,but as am startin to read yours only now,am little confused abt where to start n continue with..
can u plz help me out...
Thank you so much...
And wishin u all success in your works...
regards,
dharshana..
Dharshana - feel free to email me (janet@primrosedesign.com) if you want. I'm not exactly sure what you're asking about but I'll be happy to help.
Great info-do you know any books that you would recommend so I could better develop my eye for color. I'm not color blind-just have a tough time coming up with the right shades that really pop!
Thanks.
Ann
Ann, I'm not sure about books but if you google "color theory" there are lots of great web pages that show the color wheel and explain color relationships. Very basically, if you want colors to pop you'd choose opposites on the color wheel—like blue and orange, red and green, yellow and purple (complimentary colors). If you want colors that go together you'd choose colors that fall alongside of one another on the wheel (analogous colors). And there's the light-dark contrast, too.
Personally I'm a very visual person so I'm always looking at color. Sometimes that's in nature, sometimes indoors. Pay attention to how designers combine colors (I love Target for this) and you'll start to see combinations you like. And don't be afraid to experiment—those color wheel rules can be broken for some interesting effects.
Janet-thanks for your very helpful advice on color theory.
Ann
I have enjoyed reading your blog, and you sachets look yummy enough to eat!
Post a Comment